For advertisers
Make your first ad
All five steps, from naming it to submitting it for review.
This page walks through building an ad, from naming it to submitting it for review. It takes about five minutes. You need money in your account first, which is Add money to your account.
Click Create Ad in the menu. There are five steps and a bar on the right showing where you are. You can go back at any point.
Step 1. Ad Setup
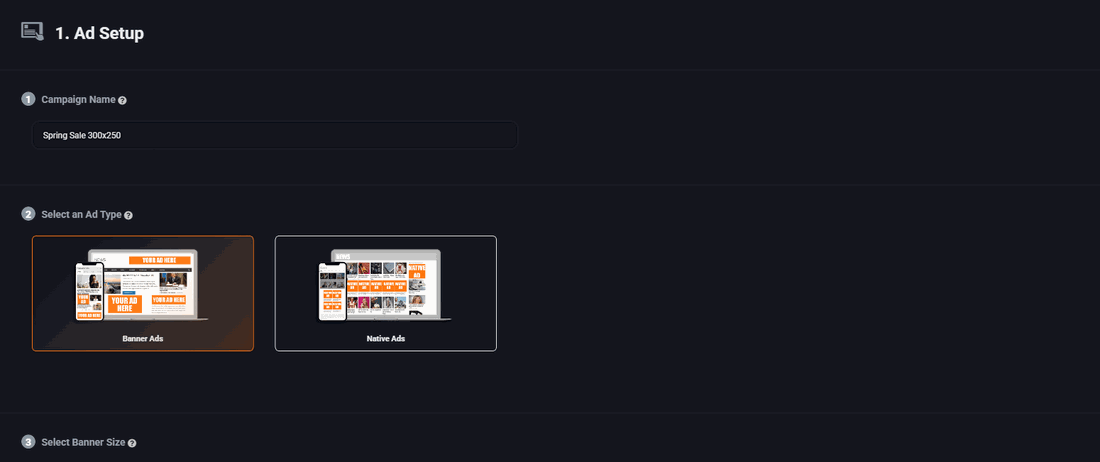
Campaign Name is for your own use. Nobody else sees it. Name it after what you are selling and where it is going, so that in three months you can tell your campaigns apart. "Spring sale, sidebar" beats "Campaign 1".
Ad type is two choices:
- Classic display banner. A picture. You supply the artwork, it appears in an ad slot. Start here.
- Native ad. Built out of a headline, a short description and a small image, and styled to match the site it appears on. More work to write, usually more clicks.
Then pick the size. The tiles show where each shape normally sits on a page.
Step 2. Creative
Click Add Banner. A box opens asking for the artwork and where the click should go.
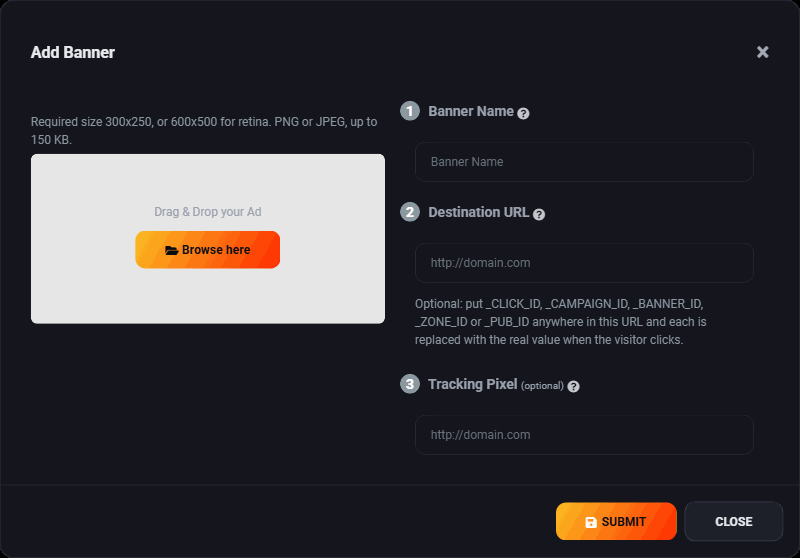
The artwork has to be exactly the size you chose in step 1, or double it for retina screens, and under 150 KB. PNG or JPEG. If it is the wrong size it will be rejected, which is better than being stretched.
A native ad takes a picture of exactly 400x300 instead, under 150 KB, PNG or JPEG, plus a headline of up to 50 characters, a short description and a brand name.
The destination URL is the page people land on after clicking. Send them to the page about the thing in the ad, not to your homepage. An ad for a specific product that dumps people on a homepage loses most of them in the first five seconds.
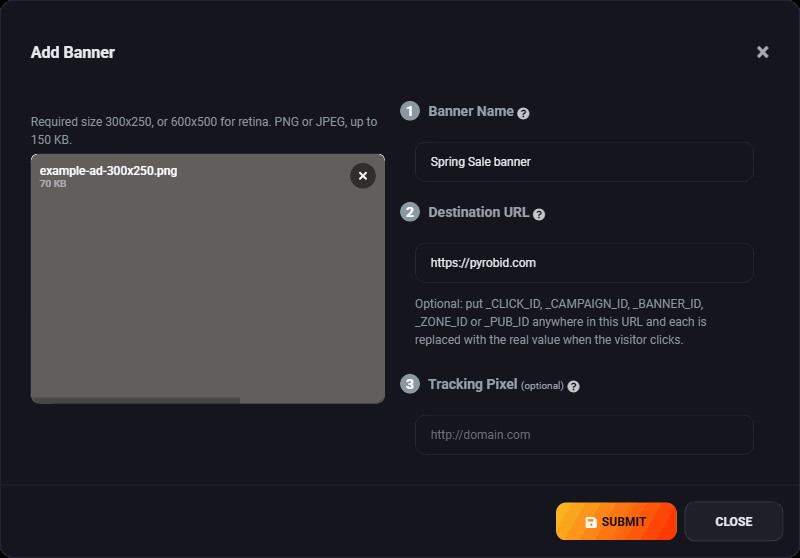
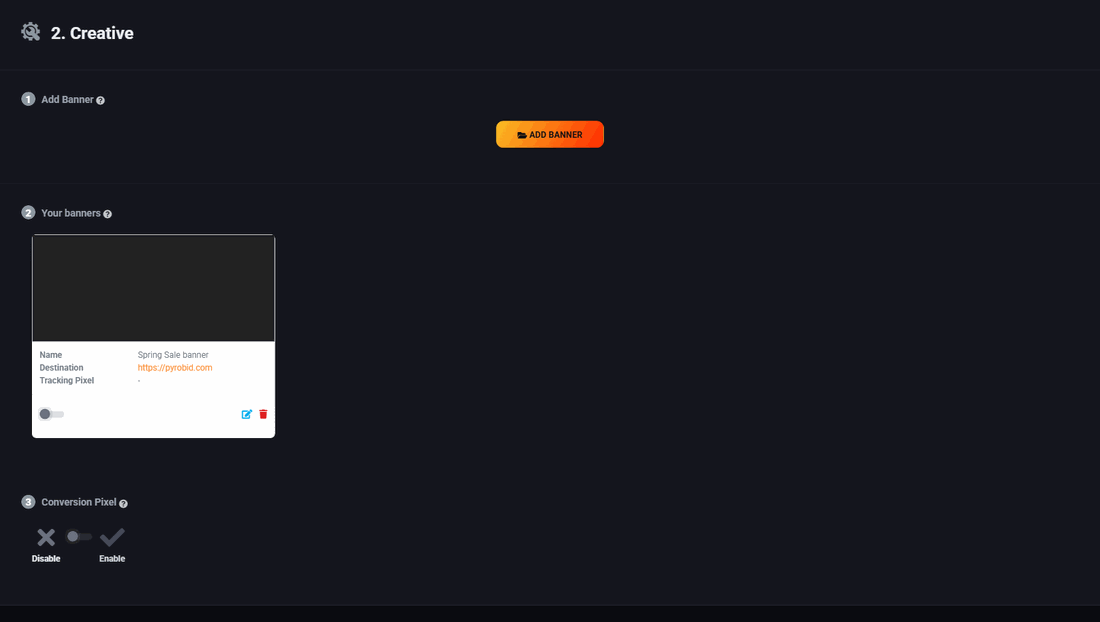
You can add more than one banner to a campaign. They share the budget and the targeting, and the system shows them in turn, so you can put two versions up and see which one people click.
Step 3. Audience
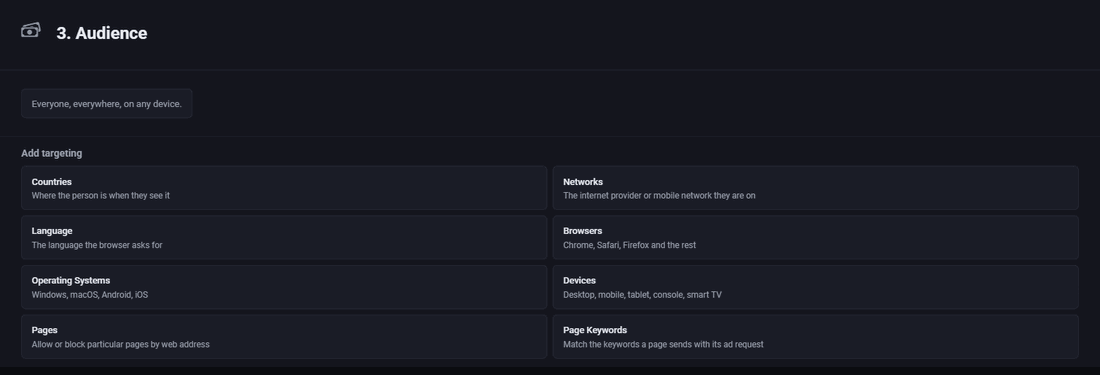
By default your ad can be shown to everyone, everywhere, on any device. The panels here let you narrow that down: location, language, device, browser and operating system, and the keywords of the page it would appear on.
Narrow it only when you have a reason. Every filter you add shrinks the number of people who can see your ad, and a filter you added out of habit is the usual reason an ad gets almost no views. If you only ship to Canada, set the country. Otherwise leave it alone.
Step 4. Budget and Placement
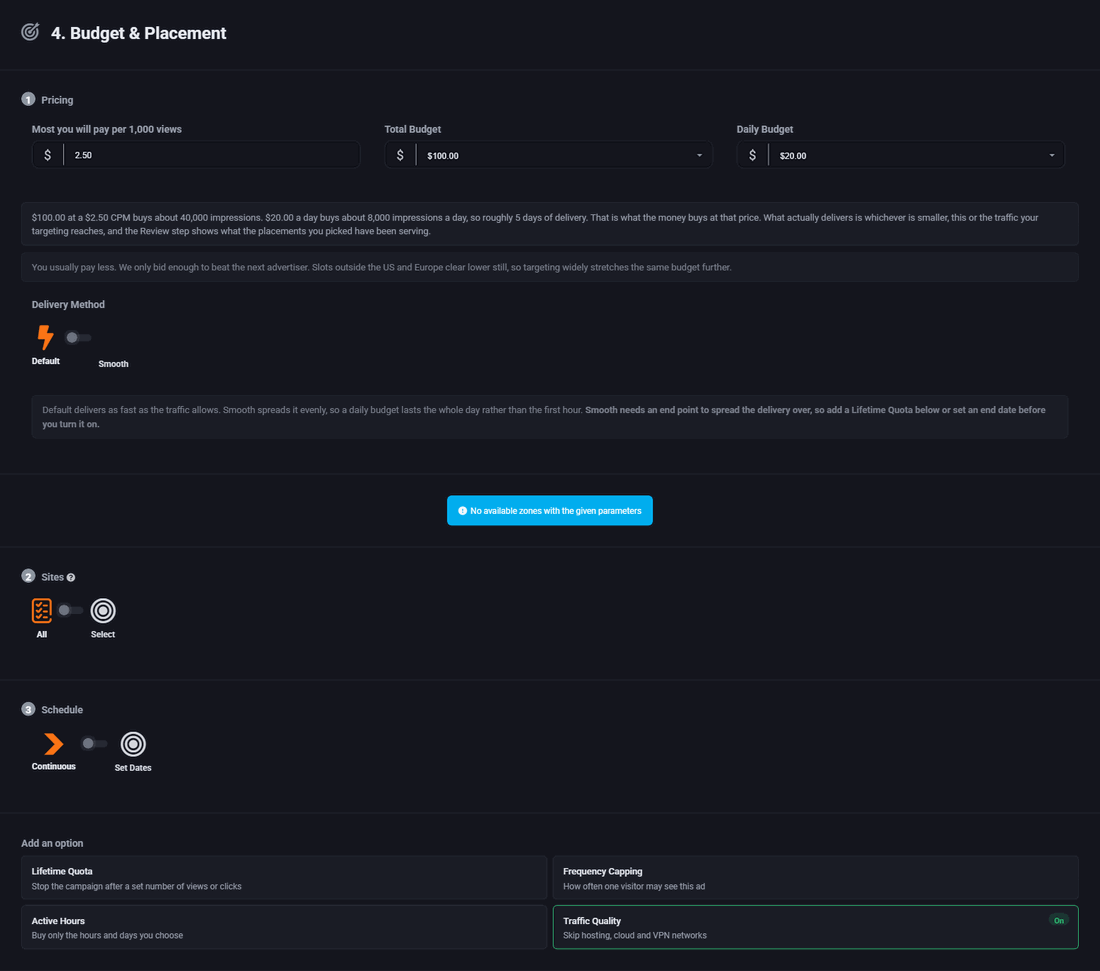
The bid goes in the box labelled Most you will pay per 1,000 views. A thousand views from the United States cost exactly that, and every other country costs a set share of it: the table under the box shows each one at the bid you have typed. Competing advertisers never bring your price down.
It is also how the slot gets shared out. If you bid twice what another advertiser is bidding, you get roughly twice as many of that slot's views, and you each pay your own number. So raising your bid buys you more of the slot, not a cheaper slot. If your ad is getting few views, this is the first thing to raise.
The one place a bid can get you nothing at all is below the publisher's floor. Under it you are not in the running; over it you are, in proportion to what you offered.
Total budget is the most the campaign will ever spend. When it is reached, the campaign stops. Daily budget spreads that out. Without it, a busy day can spend everything by lunchtime.
Delivery method decides how fast. Default spends as the traffic comes. Smooth paces it across the day so you are not gone by mid morning.
Schedule is optional. Leave it on Continuous and the campaign runs from approval until the money is gone.
Frequency capping limits how many times the same person sees the ad. Without a cap, your most loyal readers see the same picture forty times and stop noticing it. Three to five times a day is a sensible starting point.
Step 5. Review
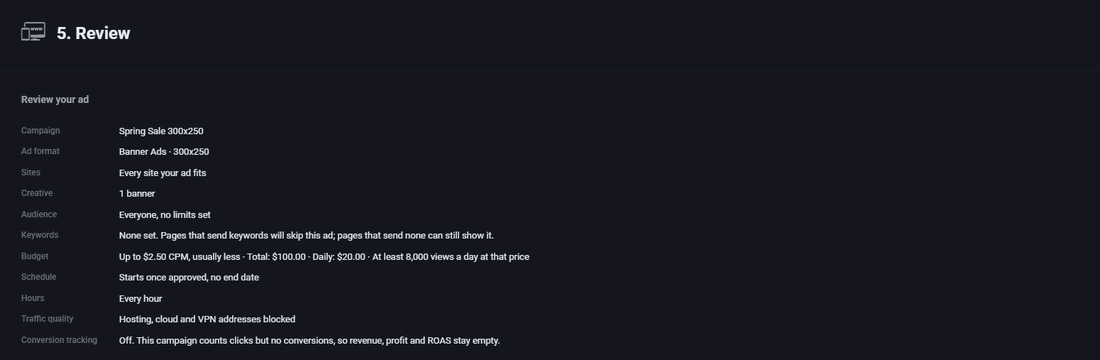
Read this page properly. It is the last point at which a mistake is free. Check the destination link, the size, the bid and the budget. Anything wrong, click back to that step and fix it.
Then submit.
What happens next
Your ad goes to whoever runs the network for review. It does not run until they approve it. That usually takes hours rather than days. You will be told when it is approved, and if it is turned down you will be told why and can fix it and send it again.
Once it is running, numbers appear on your dashboard within a few minutes. Give it a couple of days before judging it. If it is getting almost no views, raise the bid or remove a targeting filter. If it is getting views but no clicks, the problem is the artwork, not the settings.
Run all of this on your own site.
Every screenshot above is the real product. Your advertisers see the same screens under your brand, and on your own domain from the Pro plan.
Start free trial14 days free. Your existing ads keep running. Cancel anytime.